Users
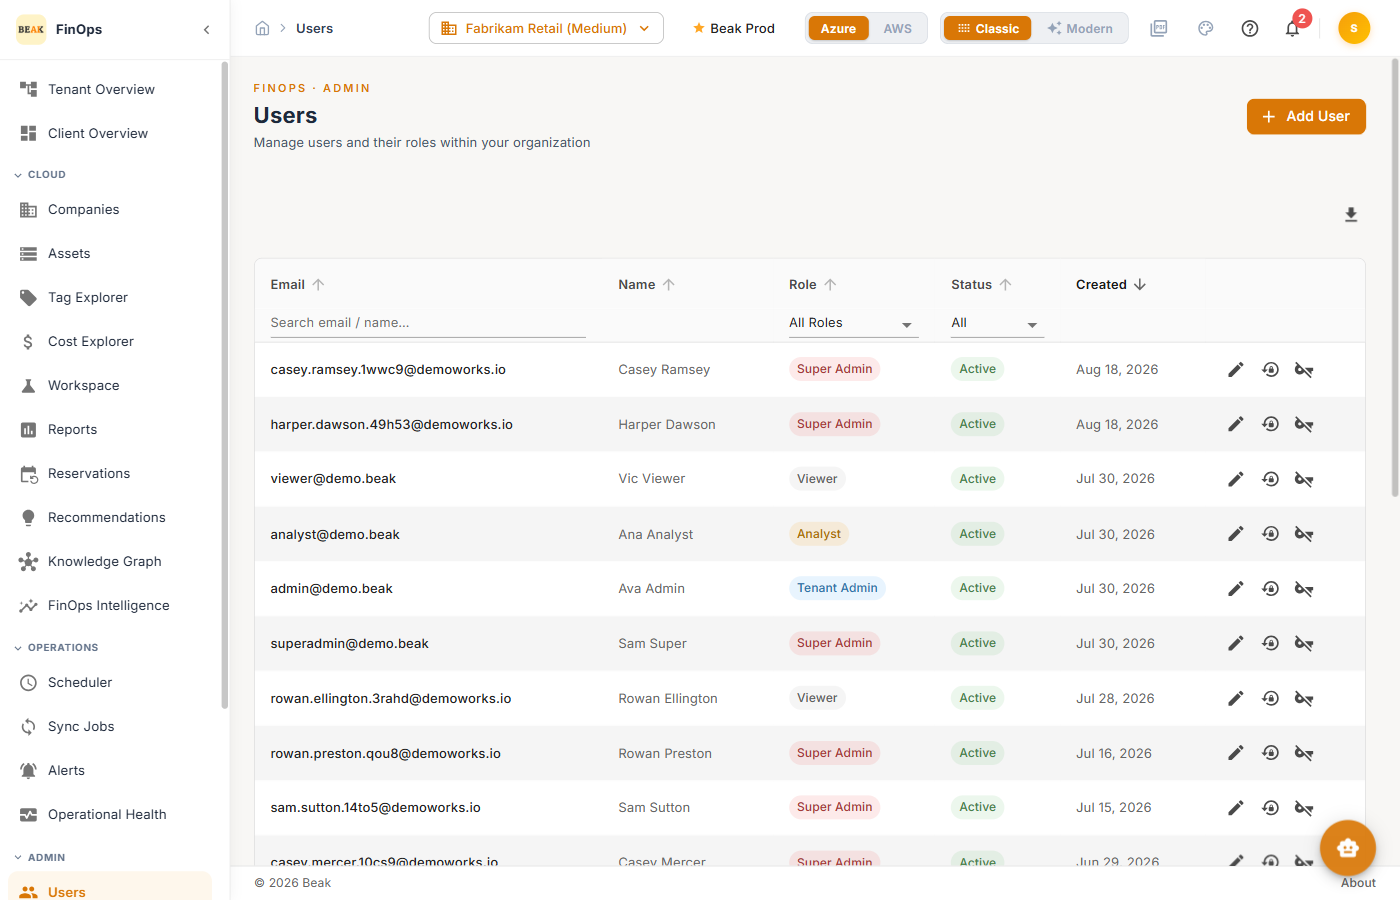
Manage the people who can sign in to Beak FinOps and the role each one holds. Users are scoped to your tenant, and every user is assigned exactly one role that governs what they can see and do.
Permissions
The Users page requires the View users permission. Creating, editing, and deleting users additionally requires Create/edit/delete users — granted to Super Admin and Tenant Admin by default. See Roles for the full permission model.
User Table
| Column | Description |
|---|---|
| The user's sign-in address | |
| Name | The user's display name |
| Role | Assigned role — Super Admin, Tenant Admin, Analyst, or Viewer |
| Status | Account status — Active |
| Created | Date the account was created |
Use the Search box to filter by email or name, and the column sort arrows to order the list.
Adding a User
Click + Add User to open the Create User dialog.
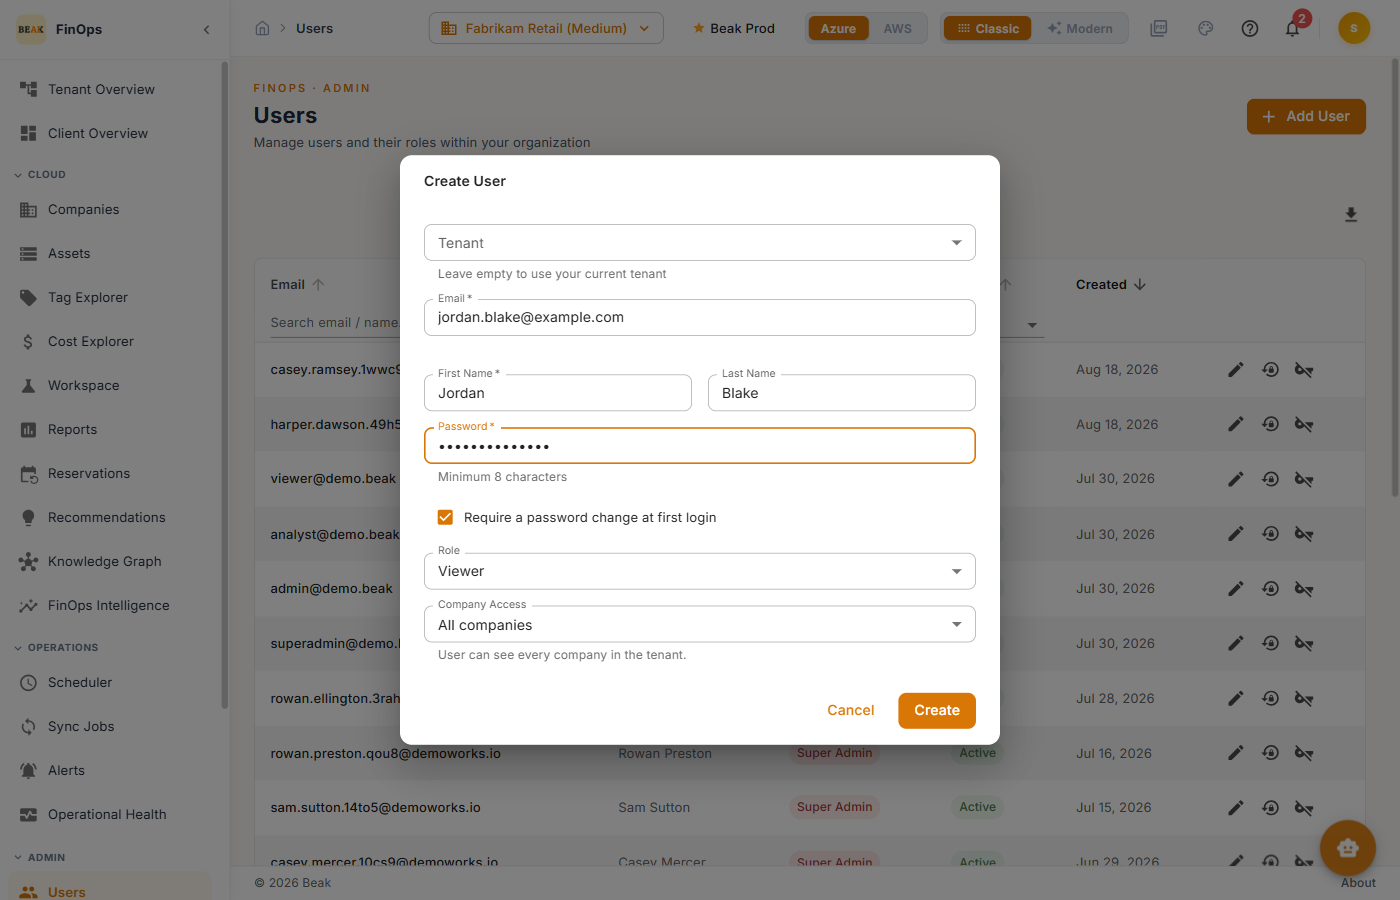
Complete the fields and click Create:
- Tenant — Leave empty to use your current tenant, or pick another tenant you administer
- Email — The sign-in address (required)
- First Name / Last Name — The user's display name (first name required)
- Password — An initial password of at least 8 characters (required)
- Role — The role to assign (defaults to
Viewer) - Company Access —
All companiesin the tenant, or a specific subset
User Actions
Each row exposes quick actions:
- Edit — Change the user's name, role, or company access
- Reset Password — Issue a new password for the user
- Deactivate — Disable the account without deleting it
Best Practices
- Principle of least privilege — Assign the minimum role each person needs; start new users at
Viewerand elevate only when required - Limit Super Admin accounts — Reserve
Super Adminfor a small number of administrators - Scope company access — For multi-company tenants, grant access only to the companies a user needs rather than
All companies - Review access regularly — Audit the user list periodically and deactivate accounts that are no longer needed
Related Pages
- Roles — Role-based access control and permissions
- Audit History — Track configuration and access changes
- Settings — SSO and tenant configuration