Creating Agents
The Agents page lists every agent in the workspace with its type, status (Active / Inactive), publish state, and last-updated time. Filters at the top narrow by type, status, and category, and the per-row icons let you edit, duplicate, view history, or activate/deactivate without opening the agent.
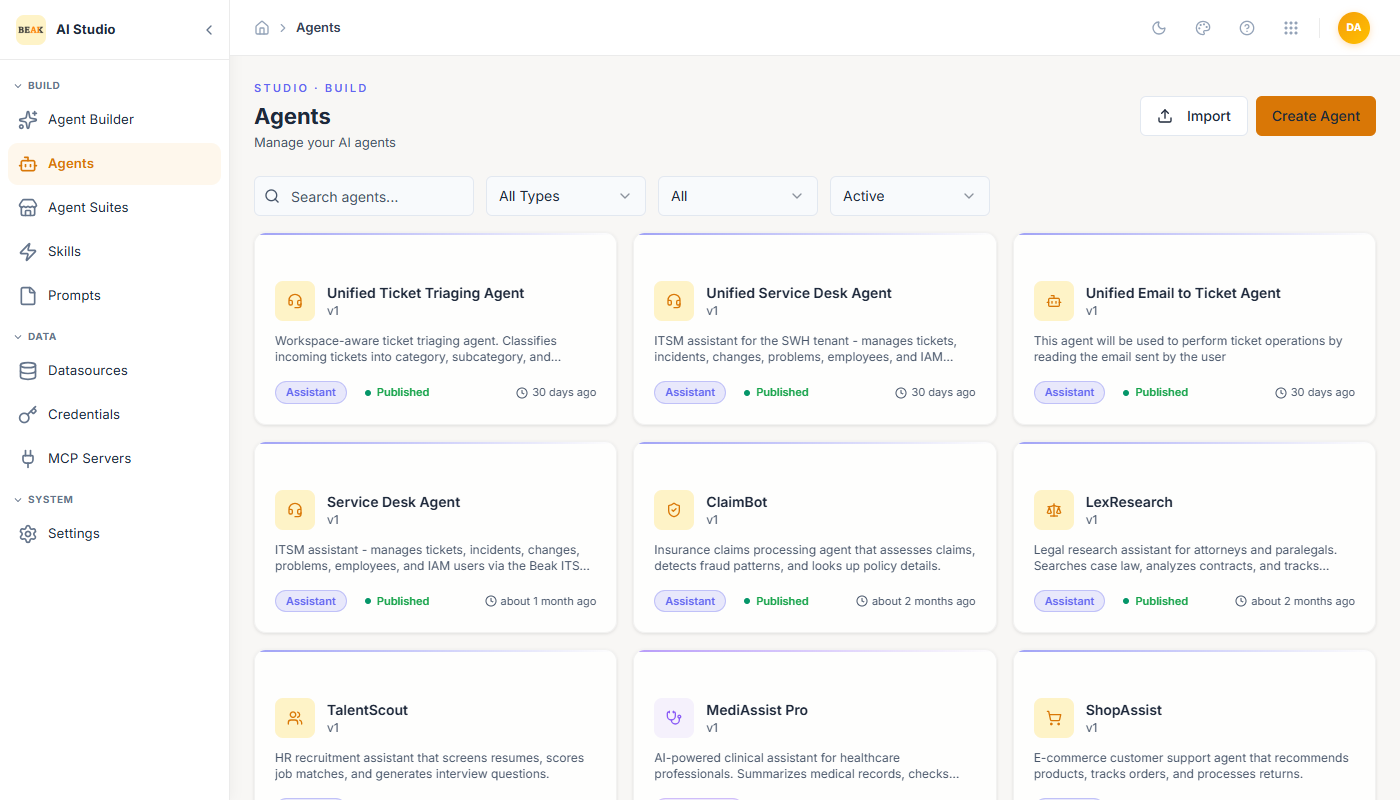
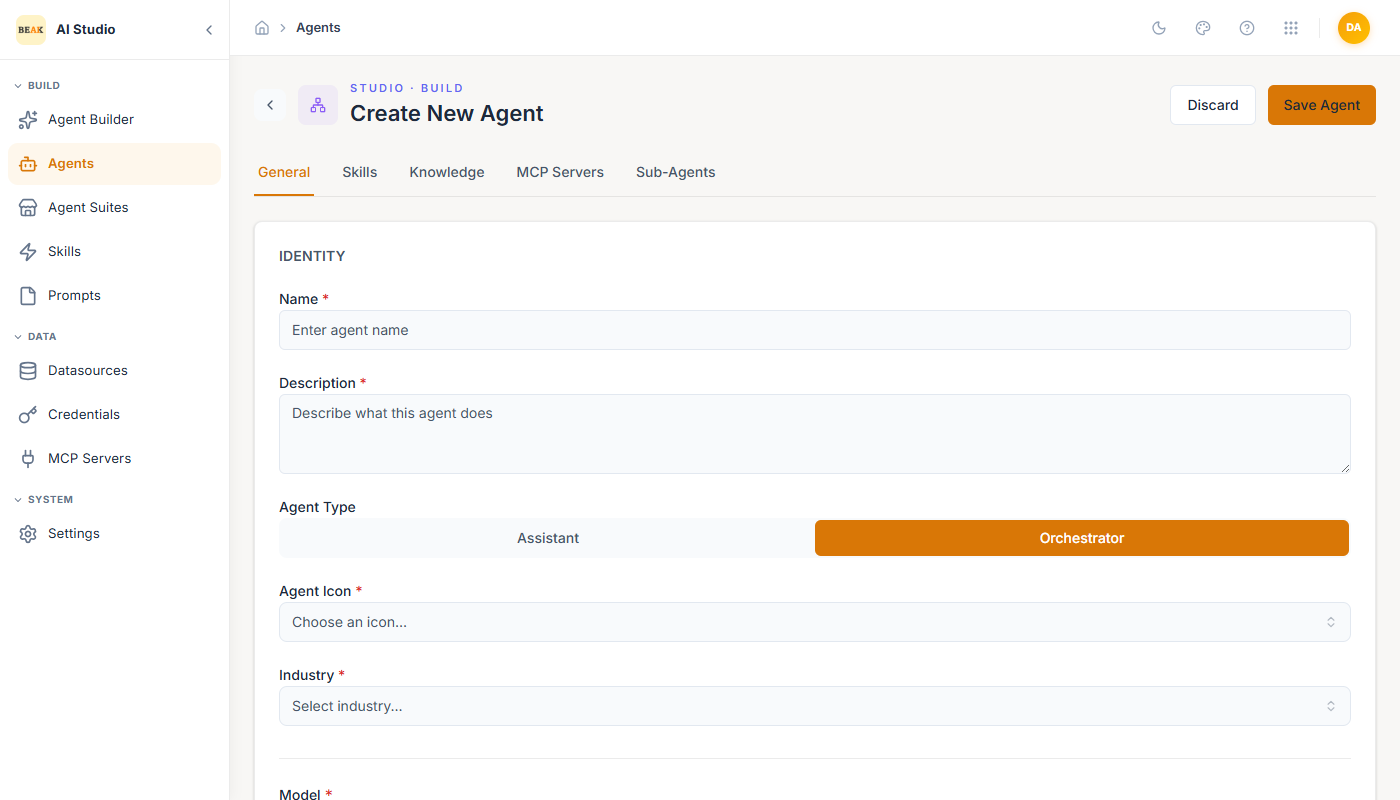
Click Create Agent in the top-right to open the builder. The builder is organized into tabs across the top — General, Skills, Knowledge, MCP Servers, and (for orchestrators) Sub-Agents. The General tab captures Identity, System Prompt, Prompt Variables, Settings, Model, and Temperature; the remaining tabs attach the agent's skills, knowledge datasources, MCP servers, and sub-agents.
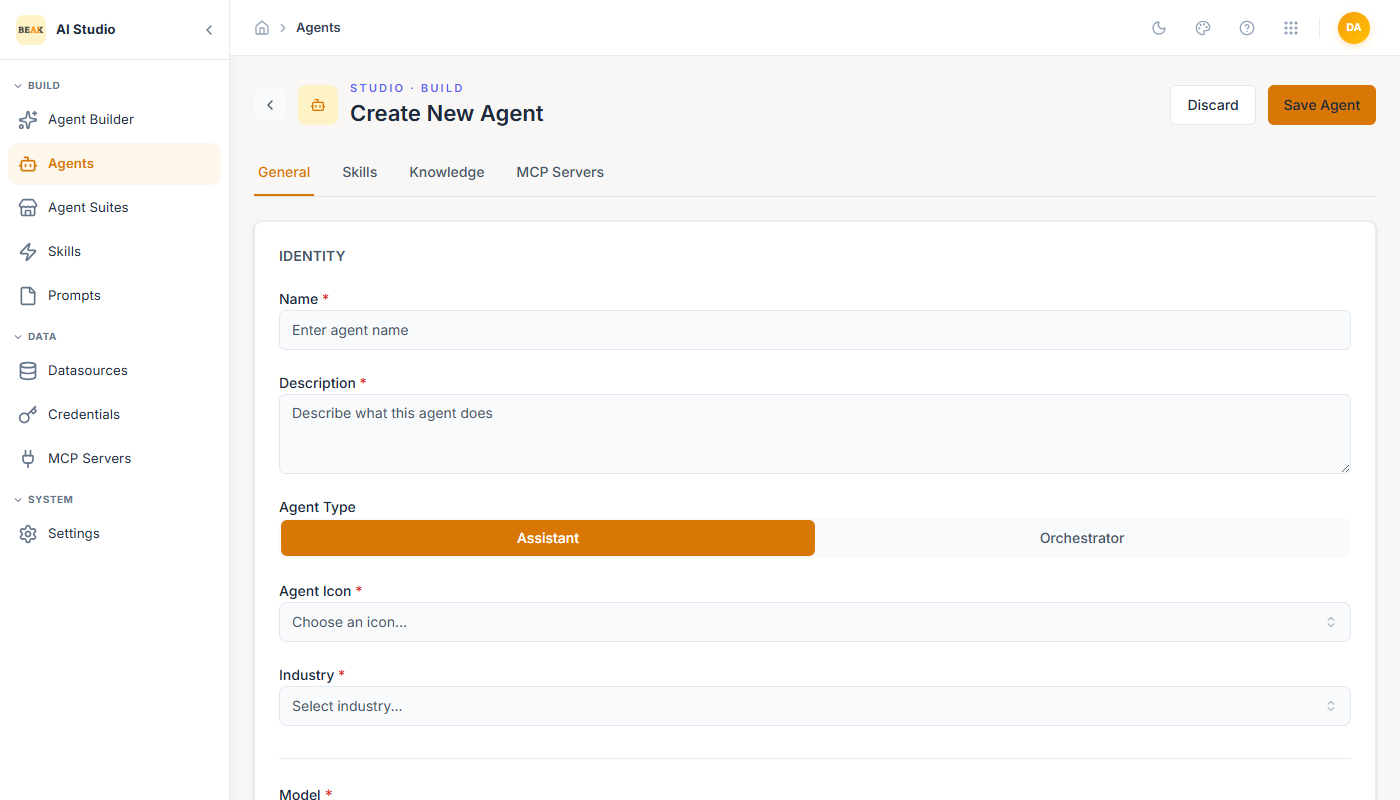
Identity
- Name — Display name shown in lists, the playground, and the runtime.
- Description — Short summary of what the agent does. Surfaced to end users.
- Agent Type —
Assistantfor single-purpose agents,Orchestratorfor agents that delegate to other published agents. The choice can be changed before the agent is saved. - Agent Icon — Either an icon from the built-in library or a custom image you upload. See Agent Icon below.
- Industry — Tag for organizing and filtering agents by domain (Healthcare, IT, Finance, etc.).
Agent Icon
The agent's icon identifies it everywhere it appears, so it is worth setting deliberately — especially for an agent your end users will chat with.
Open the Agent Icon picker and choose one of two options:
- A built-in icon — search the library and pick one. The icon is tinted to match the current theme.
- A custom image — click Upload custom image and choose a file. Use this for a product logo, a team mark, or a persona avatar.
Where the icon appears
Once set, the icon represents the agent across both Studio and the Agent Runtime:
| Surface | Where |
|---|---|
| Studio | Agents list, the builder's preview, and the agent-suite pickers |
| Runtime | Chat header, the avatar beside every message in a conversation, agent cards, and the dashboard |
| Marketplace | The agent's catalogue card, if you publish it to the Hub |
| Embedded chat | The header of an embedded or standalone chat page, and the floating launcher bubble |
Uploading a custom image
- Accepted formats — PNG, JPEG, WebP, GIF, or SVG. Whatever you upload is converted to a PNG.
- Sizing is automatic — the image is cropped to its largest centred square and resized to 256×256, so a non-square image is never squashed. Crop it yourself first if you want a specific part of it used.
- Transparency — preserved, so a logo with a transparent background stays clean on light and dark themes alike.
- Maximum source file size — 5 MB. A simple, high-contrast image reads best at small sizes, since most places the icon appears render it between 32 and 48 pixels.
To change or remove it, reopen the picker and choose Replace custom image, pick a built-in icon instead, or use Clear selection.
Note: For embedded chat, re-copy your snippet after changing the icon. The launcher script snippet under Channels → Embed contains the agent's image directly, because the floating bubble has to draw itself before the chat window loads. That makes the snippet a point-in-time copy: if you change the agent's icon later, copy the snippet again and replace it on your site, or the bubble will keep showing the old image. A built-in icon is not carried into the snippet — the launcher shows its default chat icon instead. Upload a custom image if you want the bubble to show the agent.
System Prompt
The system prompt defines the agent's persona, behavior, and operating rules.
- Inline — Write the prompt directly in the markdown editor. Supports bold, italic, code, links, headings, lists, and variable interpolation via
{{ }}. - Library — Pick a published prompt from the Prompt library. Useful when the same persona is reused across multiple agents.
Switch between Write and Preview to validate markdown rendering before saving.
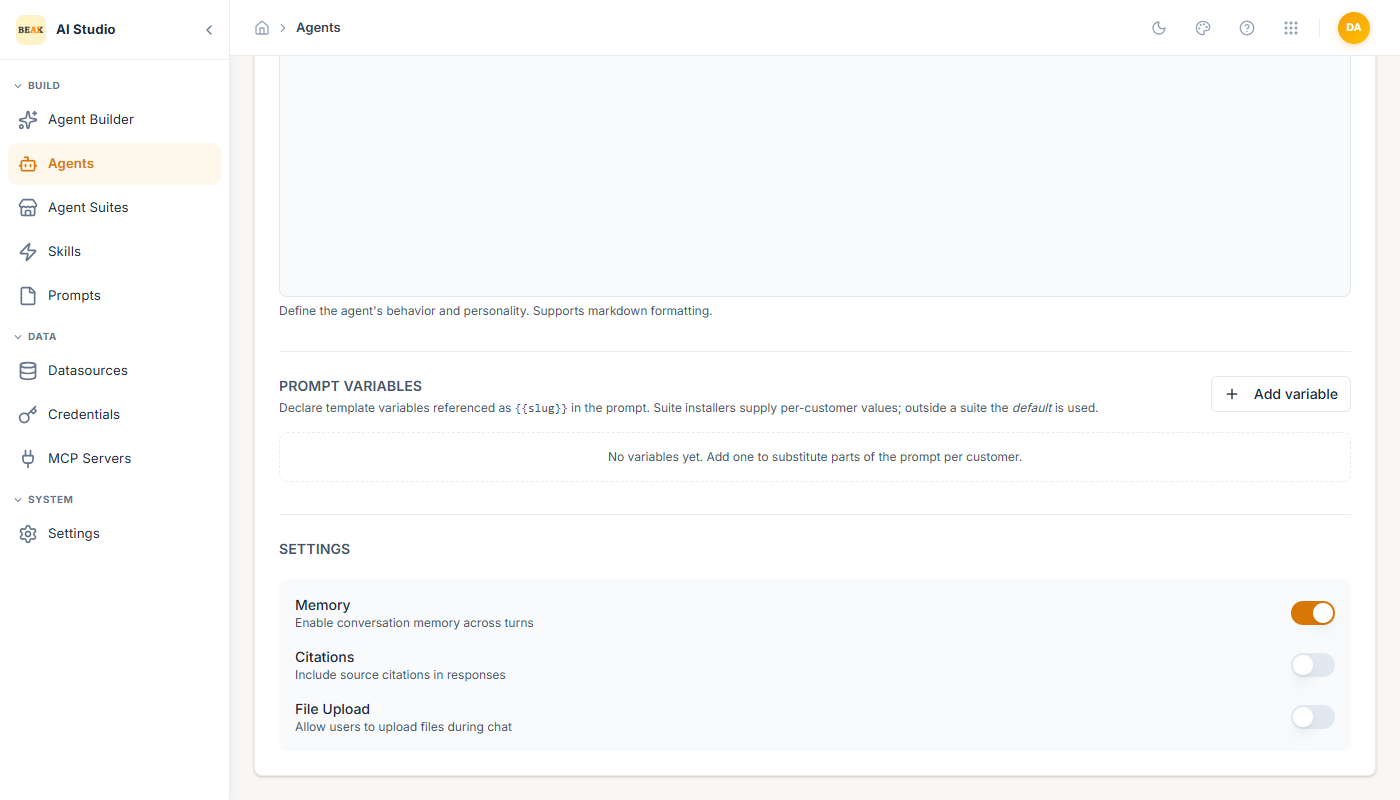
Settings
Runtime behaviors are toggled here:
- Memory — Enable conversation memory across turns. On by default.
- Citations — Include source citations in responses when the agent uses a datasource.
- File Upload — Allow end users to upload files into the chat (processed via attached datasources or skills).
- Notifications — Let the agent notify people on the workspace's configured channels. Off by default. Turning it on reveals a channel selection, a required list of allowed recipients, and an optional subject prefix — the agent can only notify the recipients named there. See Agent Notifications.
Model & Temperature
- Model — Pulled from the connected AI Gateway. Models are grouped by provider (Anthropic, Azure, Google, etc.) and each entry shows the provider tag.
- Temperature — Slider from
Precise(0.0) toCreative(1.0). Defaults to0.70.
Skills
The Skills panel is a searchable, multi-select list of every published skill in the workspace. Check the skills the agent should have access to — they appear as tools the LLM can choose to invoke during a turn. The header chip shows the count of selected skills.
Note: Only published skills appear here. Draft skills are filtered out so an agent cannot accidentally depend on something that has not been activated.
Datasources
The Datasources panel works the same way: a searchable list of every active datasource. Selected datasources are exposed to the agent as retrieval tools. Datasources marked Not Configured (such as databases that have not had their schema confirmed) are dimmed and cannot be selected until they are completed.
Sub-Agents (Orchestrator only)
When Agent Type is Orchestrator, an additional Sub-Agents panel appears between Datasources and MCP Servers. Pick the published agents this orchestrator can delegate to. The orchestrator decides at runtime which sub-agent (or its own skills) to invoke for each step.
MCP Servers
Any registered MCP Server can be attached to an agent. The MCP server's tools are auto-discovered during registration and exposed to the LLM in the same call schema as native skills.
Save, Publish, Test
The toolbar at the top of the editor controls the agent lifecycle:
- Save Agent — Persist the current configuration as a draft.
- Published toggle — Flip from draft to published. Only published agents are visible in the Playground and to the Runtime.
- Test — Open the agent in the Playground in a new thread.
- Export — Download the agent definition as a JSON file (re-importable from the Agents list).
- Discard — Drop unsaved changes.
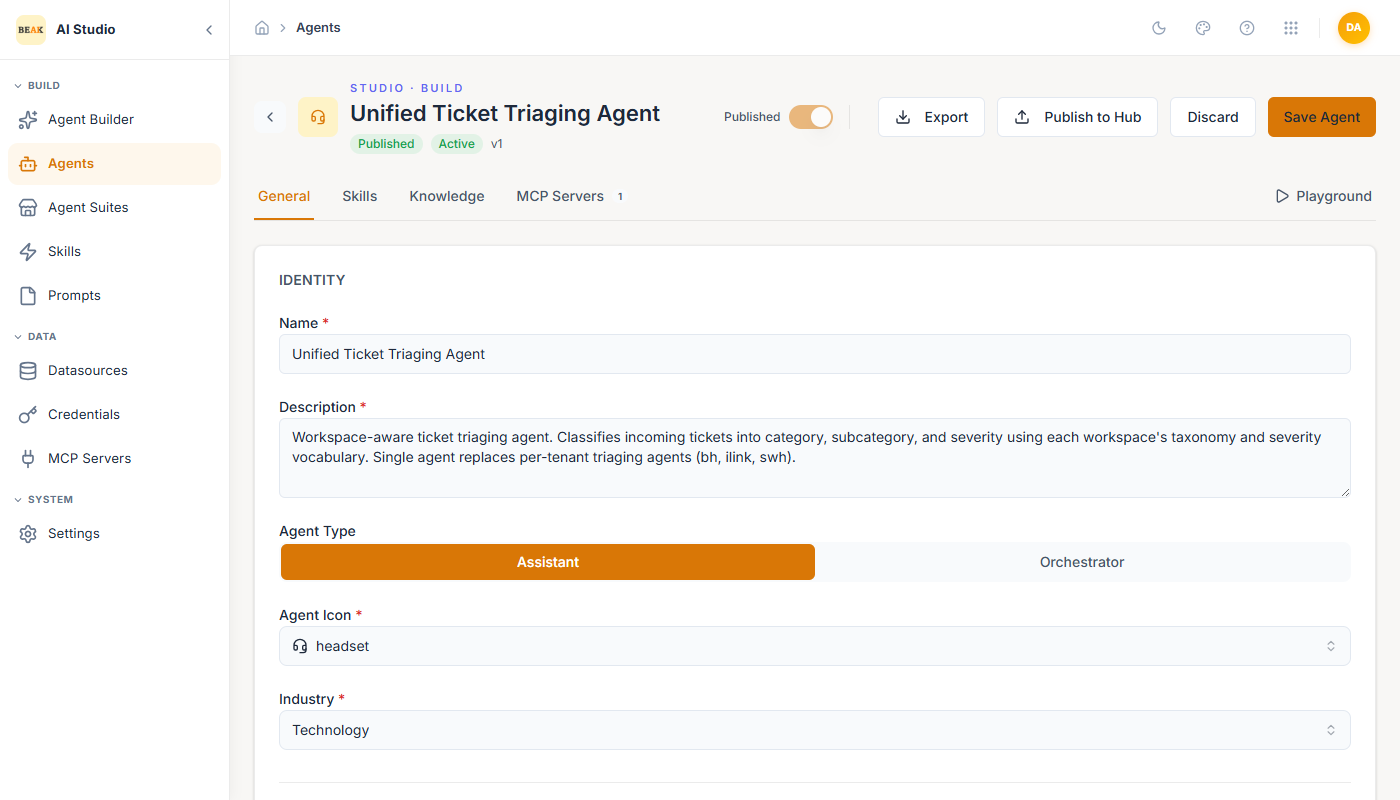
A version label (v1, v2, …) appears next to the name once the agent has been saved at least once.
Best Practices
- Start every agent with a clear, single responsibility in the system prompt — orchestrators handle the breadth.
- Keep skill counts low per agent. Five focused skills outperform fifteen overlapping ones.
- Use
Memoryoff only for stateless one-shot agents (lookups, classifiers). Conversational agents should leave it on. - Test the agent in the Playground after every meaningful edit; the runtime reflects the last published version, not the draft.